


How to Build a Biofloc Pond with HDPE Geomembrane
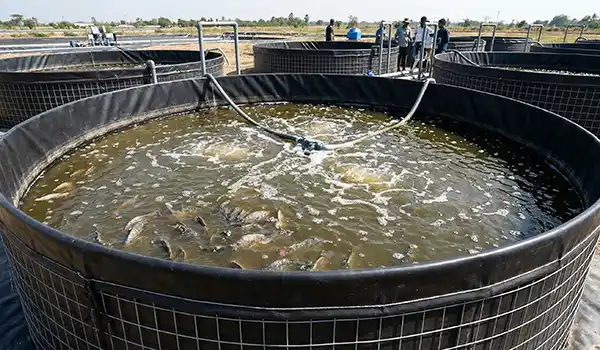
Hello! Are you looking for a way to increase fish farming yields on limited land? If so, a biofloc system is the answer. However, the secret to biofloc success lies not only in bacteria or feed, but in the pond medium.
Using HDPE Geomembrane is the best investment for ensuring your pond is leak-proof and lasts for years. Let’s go through the construction steps!
Why Should Biofloc Use HDPE Geomembrane?
Before getting into the technical details, you need to know why professionals are switching to HDPE (High-Density Polyethylene). Unlike ordinary plastic tarpaulins, which quickly become brittle under sunlight (UV), HDPE has outstanding chemical and physical resistance.
Biofloc relies on microorganisms that convert waste into protein. This process requires stable water conditions. HDPE prevents contamination from the soil and keeps water temperatures more consistent. Plus, its smooth texture makes cleaning out leftover floc much easier!
Step 1: Prepare the Site and Pond Frame
The first step is choosing the location. Make sure the site receives enough sunlight, but not too much.
- Level the Ground: Shape the ground surface so it slopes slightly toward the center (like an inverted bowl). This allows fish waste to collect in the middle for removal through a central drain.
- Install the Frame: You can use steel pipe, bamboo or steel wire mesh. Make sure the frame diameter matches the size of the HDPE sheet you purchased. Biofloc ponds generally have a diameter of 2 to 3 meters.
Step 2: Install the Central Drain
This is the most crucial part. A biofloc system depends heavily on a clean pond floor.
- Install a PVC pipe at the center point of the shaped ground.
- Make sure the pipe is firmly installed and can later connect precisely to the opening in the HDPE geomembrane.
Step 3: Prepare and Install the Geomembrane
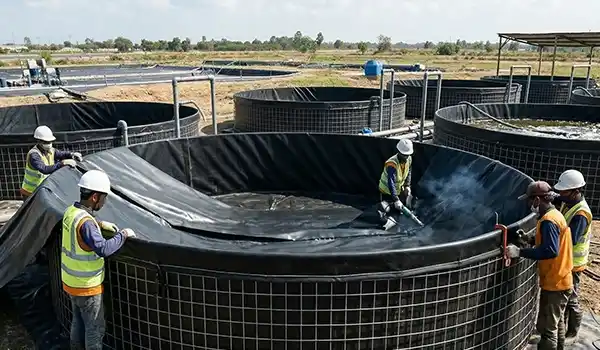
Now it’s time for the star of the show. Cut the HDPE sheet to the pond size, plus an allowance of around 20–30 cm for securing it to the top of the frame.
- Joining: If your pond is large, you may need to join HDPE sheets. Use hot wedge welding or extrusion welding so the seams do not leak.
- Installation: Slowly place the HDPE sheet inside the frame. Make sure the base is correctly centered before pulling the edges up over the frame.
Step 4: Secure the Liner and Fill with Water
Once the HDPE is neatly installed, secure the top to the frame with strong clamps or ties. Make sure there are no sharp folds where dirt could accumulate.
Fill the pond with water to a depth of 80–100 cm. Check for any seepage around the central drain. If everything is secure, you can proceed to water preparation (activating the biofloc bacteria).
Tips for Maintaining a Durable HDPE Pond
You have invested in HDPE geomembrane, so make sure it lasts! Do not use sharp objects when cleaning the pond. Although HDPE is very strong, deep scratches can shorten its service life. Also make sure the aeration system (oxygen supply) runs 24 hours a day, because biofloc requires a great deal of oxygen.
Need a Consultation for Your Requirements?
Building a biofloc pond with HDPE geomembrane requires care at the start, but the efficiency and durability you gain make it well worth it. With a strong pond medium, you can focus on managing water quality and feed without worrying about leaks.
Feel free to consult the Petra Nusa Elshada team. We supply a wide range of high-quality geosynthetics ready to ship throughout Indonesia. Let’s discuss your project needs now!
Check our catalog: Click here
Chat on WhatsApp Now: Click here
Remember Geosynthetics, Remember Petra!
Other Articles
Jumbo Bag Types and Benefits for Shipping Goods
Jumbo Bag A Jumbo Bag is a large bag that can hold a load of 1 ton (1000 kg) to 2 tons (2000 kg). It is usually used to carry goods for plantation, mining and industrial companies. Jumbo bags are also widely used for shipping goods, both domestically and abroad, packed into containers. On the […]

